
Connect your Shopify store to show its products on your links and, if you want, let visitors order from your profile. You can connect Shopify to a profile in your personal NerdyTags dashboard on the Advanced plan, or to a profile in NerdyTags Business.
Shopify doesn't have a "sign in with Shopify" step for this. Instead, you create a small app for your store in Shopify and paste its details into NerdyTags. There are two ways to do it:
Dev Dashboard (recommended): create an app in Shopify's Dev Dashboard and paste its Client ID and Client secret. This is the only option for new apps.
Existing token: if you already have a custom app that was created in your Shopify admin before January 1, 2026, paste its Storefront API access token.
Each profile can connect one Shopify store.
Who can create the app
The Shopify store owner, or a staff member with the App development permission, has to create the app. Collaborator accounts can't. This is a Shopify rule, so an agency that has collaborator access to a client's store needs the client (or one of the client's staff) to do this part. See About apps on the Shopify Help Center.
What NerdyTags asks Shopify for
NerdyTags only uses the Storefront API, the part of Shopify that powers a store's public product pages. It asks for two scopes. Product listings include your collections, so there's no separate scope for them.
Scope | What it's for | Needed? |
|---|---|---|
| Showing your products and collections | Yes |
| Starting a Shopify checkout so visitors can order | Only if you want to take orders on your profile |
These scopes let NerdyTags read your published products and start checkouts. They don't let it use the Admin API, where your orders, customer records and store settings are managed.
Option 1: Connect with a Dev Dashboard app
Step 1: Create the app in Shopify
Open Shopify's Dev Dashboard (see Shopify's guide) and sign in as the store owner or a staff member with the App development permission.
Go to Apps and click Create app.
Enter an App name, for example "NerdyTags".
Before you save, scroll down to API access and add the Storefront scopes from the table above.
Click Create app.
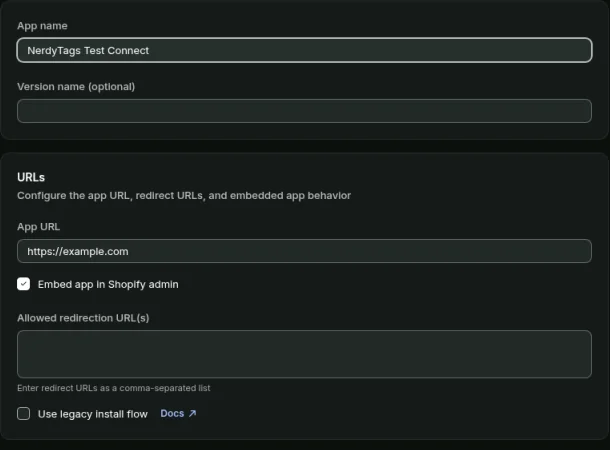
Step 2: Release the version
A Release version dialog opens. You can add a description if you like. Click Release.
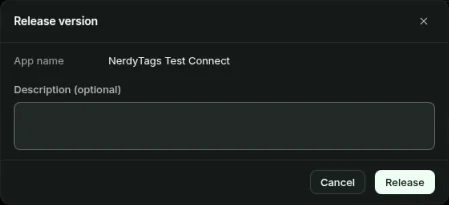
To check the scopes, open Versions and click the active version. Access scopes should list unauthenticated_read_product_listings, plus unauthenticated_write_checkouts if you want to take orders.
Step 3: Install the app on your store
On the app, open the Actions menu and click Install app.
Pick your store.
Shopify shows what the app needs access to, in its own general wording. Click Install.
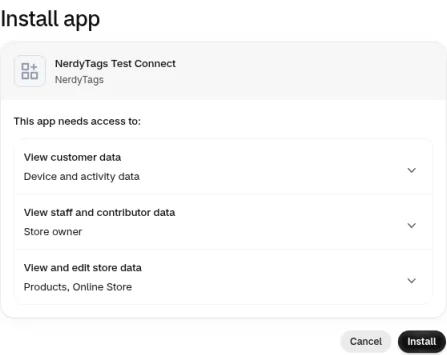
Step 4: Copy the Client ID and Client secret
Open the app's App settings. Under Credentials, copy the Client ID and the Client secret. Click the eye icon to show the secret, or the copy icon next to it.
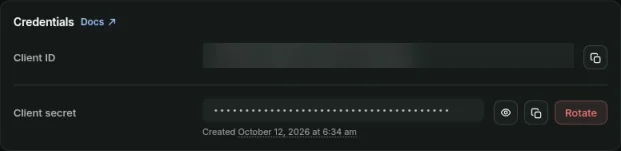
Keep the Client secret private. Anyone who has it can read your store's products.
Step 5: Paste them into NerdyTags
NerdyTags: in your dashboard, go to Settings > Integrations. In the Selling section, click Connect on Shopify.
NerdyTags Business: in NerdyTags Business, open the profile and go to Integrations. In the Shopify section, click Connect store.
The Connect a Shopify store dialog opens.
Then:
Make sure Dev Dashboard is selected at the top.
In Store name, enter your store name. That's the part before
.myshopify.com, for examplemystore.Paste the Client ID and Client secret into their fields.
Click Connect.
NerdyTags uses these details to get an access token from Shopify. Shopify's tokens expire every 24 hours, and NerdyTags renews them for you, so you don't need to do anything to keep the connection working. The Client secret isn't shown again after you connect.
Option 2: Connect with an existing token
Use this if your store already has a custom app that was created in the Shopify admin before January 1, 2026. Shopify no longer lets you create new apps this way, but existing ones keep working.
In your Shopify admin, go to Settings > Apps and sales channels.
Click Develop apps and open the app created before January 1, 2026.
Open Configuration, then Storefront API.
Turn on the Storefront scopes from the table above.
Click Save, then Install app.
Under API credentials, copy the Storefront API access token.
In NerdyTags or NerdyTags Business, open the Connect a Shopify store dialog (see Step 5 above), choose Existing token, enter your Store name, paste the token into Storefront access token and click Connect.
Use Shopify on your links
Once your store is connected, click Shopify (the shopping bag icon) on any link card. See Link options: styles, galleries, scheduling, passcodes and contact forms.
Switch to a different store
Each profile can connect one Shopify store. To use a different store, disconnect the current one first, then connect the new one.
Troubleshooting
Shopify says the app and the store aren't in the same organization. A Dev Dashboard app can only get tokens for stores in the same Shopify organization. Create the app while signed in to the Dev Dashboard with the account that owns the store, then install it on that store.
I don't see Develop apps or the Dev Dashboard, or I can't create an app. You may be signed in as a collaborator. Ask the store owner to create the app, or to give you a staff account with the App development permission.
Products don't show, or visitors can't order. A scope is probably missing. In the Dev Dashboard, create a new version with the scopes you need, release it and approve the update on your store. For an existing token, turn the scopes on under Configuration > Storefront API and click Save. Then disconnect Shopify in NerdyTags and connect it again.
Do I need to renew the token? No. With the Dev Dashboard option, NerdyTags gets a new token before the old one expires. If you click Rotate on the Client secret in Shopify, connect again with the new secret.
The connection stopped working. Check that the app is still installed on your store, then disconnect Shopify in NerdyTags and connect it again.