
Automations decide what happens when a new lead comes in on your company profiles. Notify teammates, send an email, tag the lead, or send it to Mailchimp, Google Sheets, HighLevel, Asana, Zapier and more.
Find them under Automations in the sidebar of NerdyTags Business.
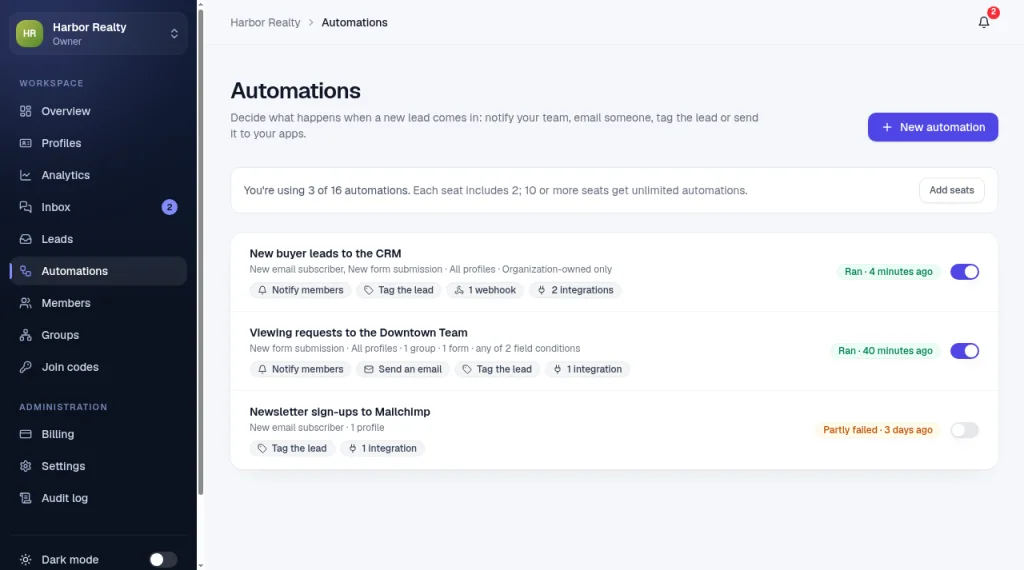
How many automations you can have
Each seat includes 2 automations. Organizations with 10 or more seats get unlimited automations. The banner at the top of Automations shows how many you're using, for example "You're using 3 of 16 automations," and an Add seats button if you want more.
When you have none yet, you'll see: "No automations yet. Create an automation to notify your team, tag leads or send them to Zapier, Mailchimp, Google Sheets and more."
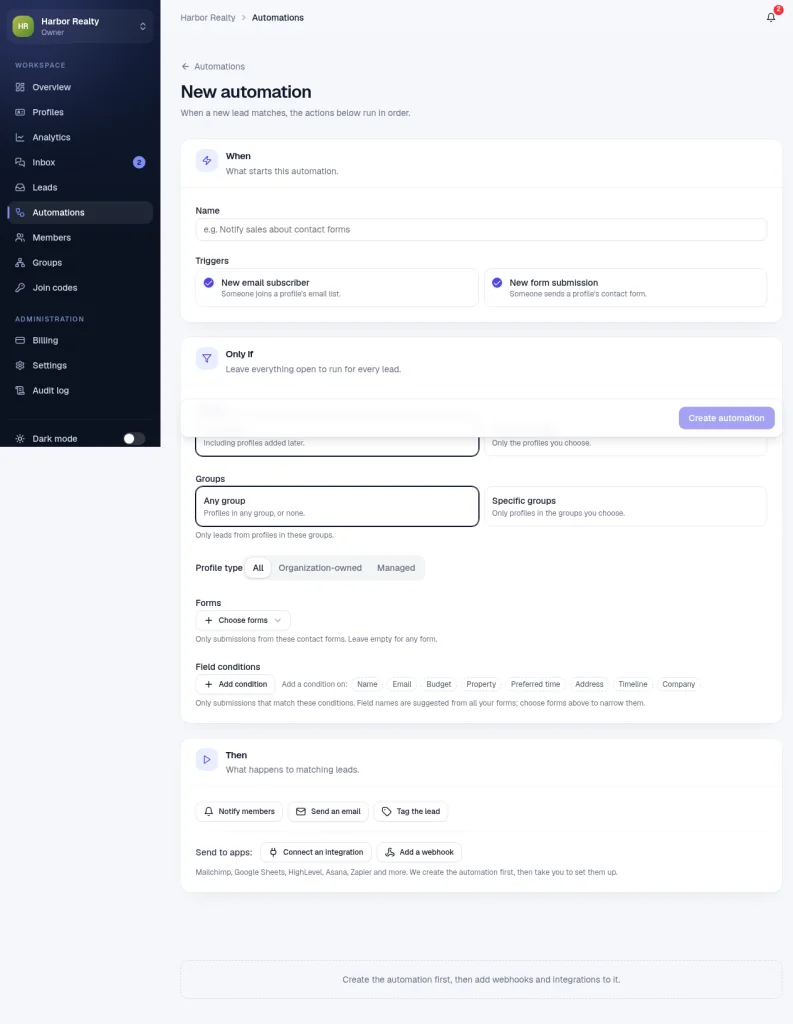
Create an automation
Go to Automations and click New automation.
Give it a Name, for example "Notify sales about contact forms."
Under When, choose what starts it. Both start switched on:
New email subscriber: someone joins a profile's email list.
New form submission: someone sends a profile's contact form.
Under Only if, leave everything open to run for every lead, or narrow it:
Profiles: All profiles or Specific profiles.
Groups: Any group (profiles in any group, or none) or Specific groups.
Profile type: All, Organization-owned, or Managed.
Forms: choose specific contact forms, or leave empty for any form.
Field conditions: match form answers, for example Budget or Preferred time. Suggestions come from your existing forms.
Under Then, pick what happens when a lead matches:
Notify members
Send an email
Tag the lead (up to 5 tags)
Click Create automation.
Mailchimp, Google Sheets, HighLevel, Asana and webhooks are added after you create the automation. The form reminds you: "Create the automation first, then add webhooks and integrations to it."
Both triggers start selected. If you only want form submissions, turn New email subscriber off before you create the automation.
Edit an automation
Open an automation from the list. At the top you can turn it On or Off, or Delete it. Change the name, triggers, filters and actions, then click Save changes.
Notify members
Choose who gets notified: specific members, groups and roles. You can limit it to group managers only. People need permission to see the lead for the notification to be useful.
Send an email
Send an email when the automation runs. Set the recipients and message in the action, then save.
Tag the lead
Add up to 5 tags to matching leads. Tags stay on the lead in Leads even if you later delete the automation.
After you save, the automation page also shows where to connect apps, add webhooks, run a dry test and review recent runs.
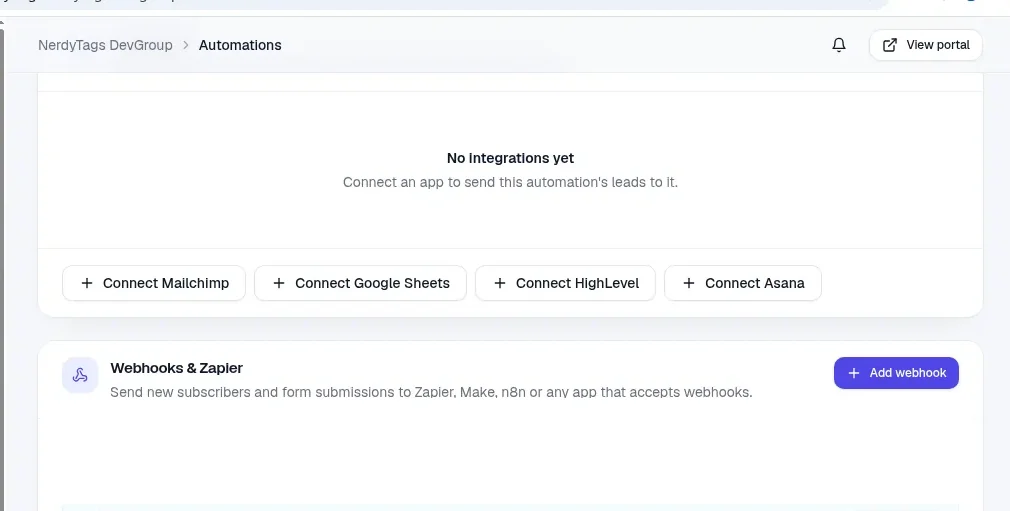
Connect apps on an automation
After you create an automation, scroll to its Integrations section and connect an app for that automation only:
Mailchimp
Google Sheets
HighLevel
Asana
Each connection only receives leads that match this automation's triggers and filters. See Connecting HighLevel to NerdyTags Business and Connecting Asana to NerdyTags Business.
Add a webhook
Webhooks send matching leads to Zapier, Make, n8n or any app that accepts webhooks. They live on the automation, under Webhooks & Zapier. Each automation can have up to 2 webhooks.
Open the automation and click Add webhook.
Give it a Name.
Paste an https:// webhook URL from your app.
Save. Your signing secret is shown when the webhook is created. NerdyTags signs deliveries with the
X-NerdyTags-Signatureheader.Use Send test to deliver a sample. Check Recent deliveries, and use Pause or Delete from the webhook's menu when you need to.
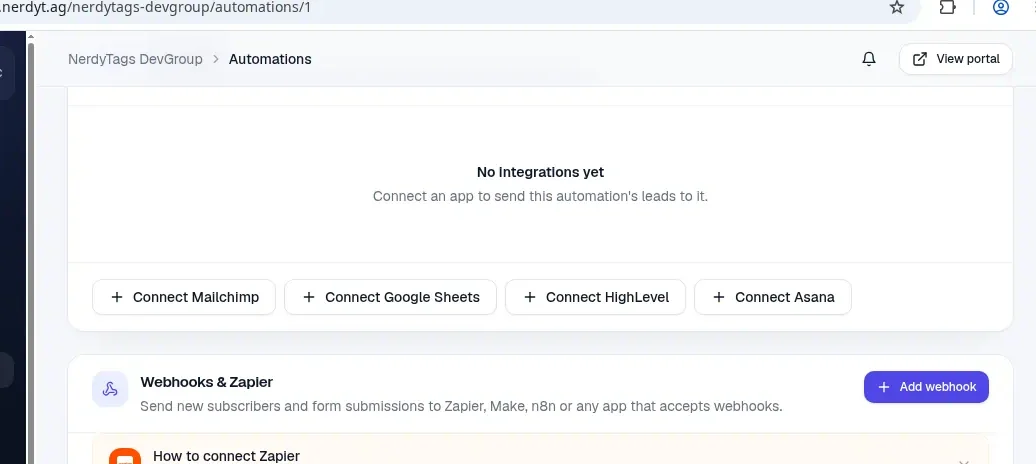
Triggers and profile filters for the webhook come from the automation itself. See Sending leads to Zapier, Make and other apps with webhooks.
Test without sending anything
At the bottom of an automation, Test runs a dry run on a sample lead. Pick a trigger and a profile, then click Run test. Nothing is sent, notified or tagged, and dry runs do not appear in Recent runs.
Recent runs
Recent runs lists the last 50 runs from the past 30 days. Each row shows the trigger, the lead, the profile and whether the run succeeded.
Delete an automation
Deleting an automation removes its webhooks and app connections. Leads that were already tagged keep their tags.
Profile-level integrations
Automations cover company-wide routing. Each profile can also have its own integrations.
On Profiles, open a profile with Edit.
Go to Subscribers and find the Integrations panel.
Turn Send to automation integrations on or off for that profile.
Use the Connect buttons in the same panel to connect Mailchimp, Google Sheets, HighLevel or Asana for that profile only.
A profile's own connections work whether the automation switch is on or off, so a profile can use both. See Creating and managing company profiles.
Tracking pixels are separate
Company-wide Google Analytics and Meta Pixel IDs stay under Settings > Tracking. They are not part of Automations. See Company tracking and integrations.