Connect Mailchimp to an automation and NerdyTags adds your email subscribers to a Mailchimp audience for you. People who subscribe after you connect are added automatically, and you can send earlier subscribers with one click, so your list is always ready for your next campaign.
You'll set this up in NerdyTags Business under Automations.
Step 1: Open the automation
In the sidebar, go to Automations, then create a new automation or open an existing one.
Under Send to apps, click Connect an integration.
On the Integrations card, click Connect Mailchimp.
Want to do more with the same automation, like getting notified or posting to chat? See Automation actions: notify, email, tag and post to chat.
Step 2: Log in to Mailchimp
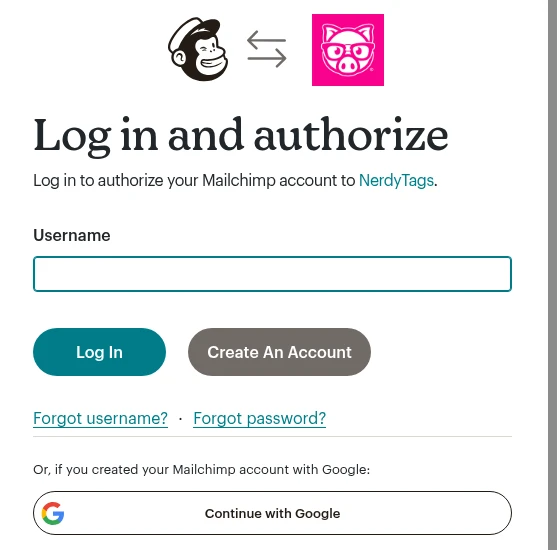
A popup opens titled Log in and authorize. Sign in with your Mailchimp username and password. If your Mailchimp account is linked to Google, click Continue with Google instead.
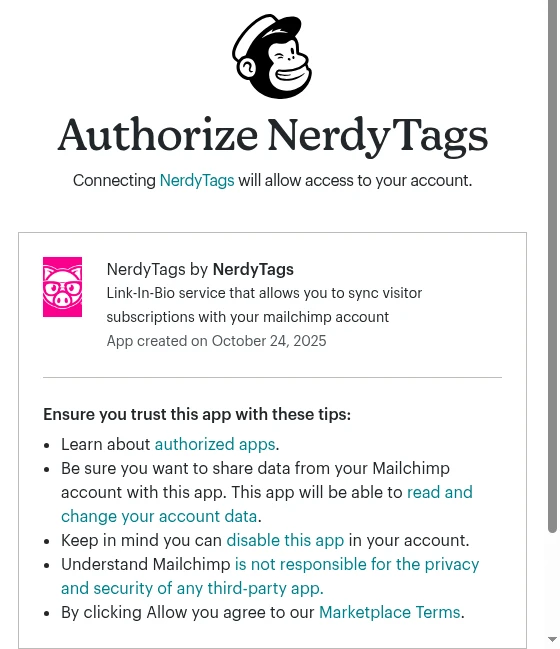
Next, you'll see the Authorize NerdyTags screen. It explains that NerdyTags will be able to read and change your account data, which it needs to add subscribers to your audience. Click Allow and the popup closes.
Step 3: Choose your audience
Back in NerdyTags, you'll see the message "Connected. Finish setting it up below." The Mailchimp card shows Needs setup and asks you to choose the audience new subscribers should join. Pick an audience from the dropdown.

Your choice saves right away and you'll see Audience saved. There's no separate Save button. The card then shows Synced.

Send subscribers you already have
When you connect, NerdyTags sets a start date. Only people who subscribe after that are sent automatically, and the card lets you know: "Only people who subscribe after this was set up are sent. Use 'Send existing subscribers' for earlier ones." If you choose a different audience later, the start date resets, so the new audience starts empty.
To send earlier subscribers too, click Send existing subscribers on the card. The button is there for 90 days after setup, and it sends subscribers from the last 90 days. You'll see how many people will be sent and can confirm before anything happens. Anyone already in your audience is updated, not added twice.

When you click the button, a dialog shows how many people will be sent, and you can cancel or confirm:
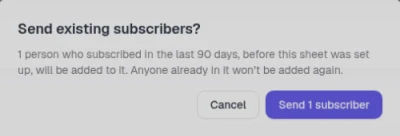
This example is from Google Sheets. The dialog's wording matches the app you're connecting (sheet, audience, list or contacts), so for Mailchimp it talks about your audience. After you confirm, the start date line and the button disappear from the card.
Don't see the button? That means all your subscribers have already been sent, or setup was more than 90 days ago.
What gets sent to Mailchimp
New email subscribers only. Contact form submissions aren't sent to Mailchimp. To keep track of form leads, use Google Sheets or a webhook.
Added as Subscribed. Contacts join your audience as Subscribed, with no double opt-in email.
No tags or field mapping. NerdyTags doesn't add Mailchimp tags or let you choose which fields are mapped.
No duplicates. When you use Send existing subscribers, people who are already in your audience are updated, not added a second time.
Here's how a subscriber looks in Mailchimp once they've been added:
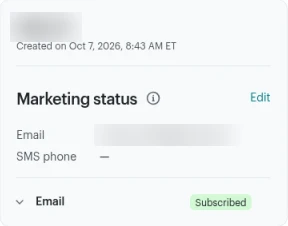
Keep in mind that your Mailchimp plan limits still apply. If your audience is full, Mailchimp may not accept new contacts.
When subscribers show up
New subscribers are added automatically, usually within a couple of minutes. Subscribers from before you connected are only sent when you use Send existing subscribers.
Sync now only re-sends people who subscribed after the start date, or from the last 90 days once you've used Send existing subscribers. It never sends your whole history.
Manage the connection
On the connected Mailchimp card you can:
Use the audience dropdown to choose a different audience. This resets the start date, so the new audience starts empty.
Use the Enabled switch to pause or resume sending subscribers.
Click Sync now to re-send recent subscribers right away.
Click the pencil next to the name to rename the connection.
Click the trash icon to disconnect Mailchimp.
Check that it's working
Run test on the automation is a dry run. It doesn't send anything to Mailchimp or other apps.
To confirm the connection, wait for a real signup (or subscribe to one of your profiles yourself), then check Recent runs on the automation and look for the new contact in your Mailchimp audience.
Deleting subscribers
When you delete a subscriber in NerdyTags, they're also unsubscribed in Mailchimp. For company connections, someone who's still subscribed on another profile that feeds the same connection isn't unsubscribed.
Clicking Sync now also unsubscribes anyone in your audience who's already unsubscribed in NerdyTags, for the same people Sync now covers: those from after the start date, or from the last 90 days once you've used Send existing subscribers.