
One NerdyTags account can run several profiles, for example one for you and one for your band or business. Each profile has its own username, links, theme and stats. Every plan, including Free, can create unlimited profiles.
Create a new profile
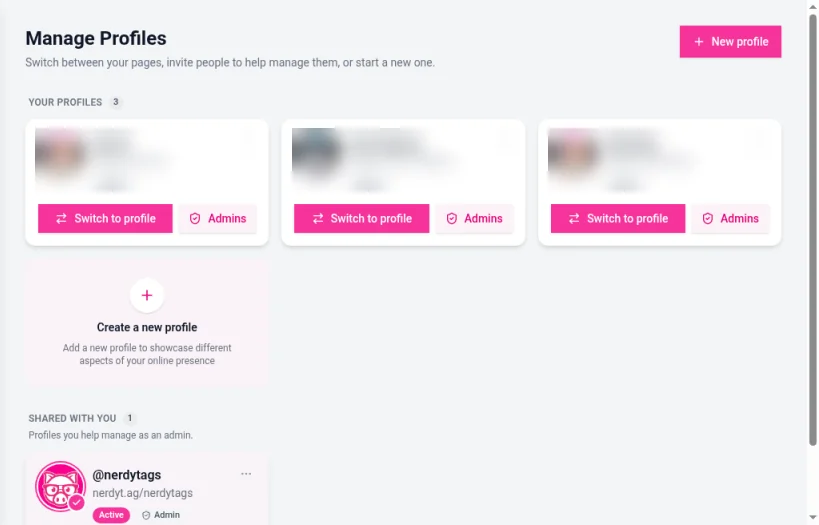
In your dashboard, click your @handle at the top of the sidebar and choose Manage profiles.
Click New profile or Create a new profile.
Enter a Username for the profile. It becomes the address after nerdyt.ag/, and it must be 3 to 30 characters using letters, numbers and underscores.
Click Create profile.
NerdyTags creates the profile and opens a short five-step setup for it: About you (photo, name or title, and bio), Look (a starting theme), Socials, Discovery (Discover listing, tags and a Save contact button) and Done. You can skip any step or click Finish later. When you click Go to my dashboard at the end, the new profile is the one selected, so you can carry on adding its links. Getting started with NerdyTags covers each step.
Switch between profiles
Click your @handle at the top of the sidebar and pick a profile under SWITCH PROFILE, or
On Manage profiles, click Switch to profile on the profile's card.
Your dashboard then shows that profile's links, theme, analytics and settings. Check the @handle in the sidebar before you make changes, so you edit the right profile.
Invite admins
Admins can help you manage a profile. This is useful for managers, assistants or team members.
Go to Manage profiles.
On the profile's card, click Admins.
Under Invite an admin, enter the person's Name and Email Address.
Click Send invitation.
They'll get an email with a link to accept the invitation. Once they accept, they're listed under Current admins. To remove an admin, click the trash icon next to their name.
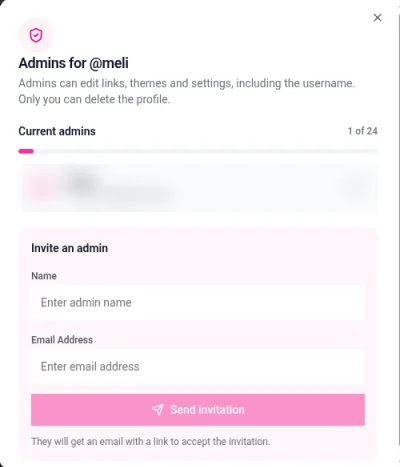
How many admins each profile can have depends on your plan:
Plan | Profile admins |
|---|---|
Free | 4 |
Pro | 8 |
Business | 24 |
What admins can do
Admins can edit the profile's links, theme and settings, including its username. Only the owner can delete the profile. Each profile shows its role on Manage profiles: Owner for profiles you created and Admin for profiles you help manage.
Since admins can change the username, only invite people you trust.
Profiles shared with you
If someone adds you as an admin, their profile appears on your Manage profiles page under SHARED WITH YOU, labeled Admin. You can switch to it the same way you switch to your own profiles.
Profiles and plans
Your plan's paid features apply to the profiles you turn on as premium pages. Pro includes 3 premium pages and Business includes 6. See What are premium pages?
Settings that apply to every profile
Your login email, password, language and two-factor authentication belong to your account, so they apply to every profile you manage. Username, Discover visibility and privacy settings are set per profile. See Profile and privacy settings.